 I’m typically not really a crafty person, but I do like making photo Valentines for the kids. I feel like they are more personal and a fun thing to save in their scrapbook, and I’ve managed to figure out how to make them on the cheap and without leaving my house. But on a more practical level, they tend to be easier to assemble than the store-bought variety, it allows me to avoid standing over 4 kids signing 25 valentines each. In past years I’ve done optical illusion Valentines using a closet dowel as a lollipop stick:
 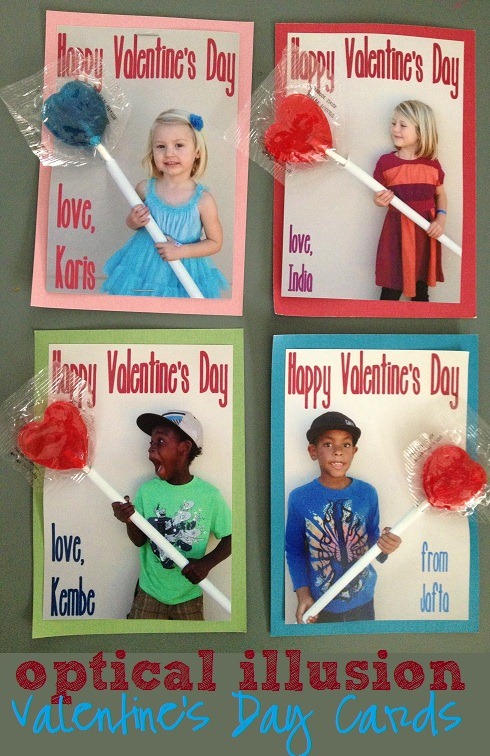 (You can see those tutorials here and here.) These cards are really cute, but there is some assembly required, and cutting notches and inserting lollipops can get a little tedious for 4 different classrooms. Last year, I wanted to find something even easier, and that cost less money per Valentine.Cheap, lazy, and cute . . . this was my mission. I scoured Pinterest for some ideas and saw some cute photo-booth style valentines. I decided to try the same thing and they worked out really well. Here was last year’s result:
  You can see the full tutorial for that project here. I did something similar this year, except without the chalkboards. First, I grabbed my iphone and snapped some pictures of each kid making different faces. This part took about 10 minutes.

") Then, using the diptic app, I created collages to make the photobooth strips. Unfortunately Diptic doesn’t have a 3×4 collage, so first I made a 3×2 collage like this:
Then, using the diptic app, I created collages to make the photobooth strips. Unfortunately Diptic doesn’t have a 3×4 collage, so first I made a 3×2 collage like this:  Then I opened the collage that looks like this, and changed the frame sizes to make room for the collage above, and for a small bit of white at the bottom of each photo.
  I inserted the first photo collage I made, added a third photo to the middle row, and just put white at the bottom. I made sure the aspect was 2:3 because this will ensure the sizing is right to print on a 3×6 photo.
  Then I took that saved photo and opened it in the Over app, and put a little Valentine’s message at the bottom of each photo strip.
  If you have more than one kid, you can also do the photostrip like this:
  After I saved the photos, I uploaded them to Shutterfly and ordered enough for each lass member. If you are pressed for time, you can send Shutterfly photos to your local CVS or Target and pick them up the same day. I also ordered a box of Airhead candies from Amazon (with 2-day shipping.)
  Once the photos arrived, I had the kids cut them down, and then we taped each one to one of the airheads.
  Prints at Shutterfly cost 15 cents, and each photo yields three valentines, so I’m looking at about 5 cents per valentine. Not too bad! And in all, taking the photos, making the collage on my phone, and sending the photos to Shutterfly took me about an hour. Cutting the photos (or supervising the kids) took me another hour . . . but since Shutterfly delivers I saved myself a trip to the store, which in my book is always a win. Once cut, each valentine will look like this:
  Have you seen any other fun ideas for Valentines?

Rage Against the Minivan sometimes earns revenue through sponsored posts, which are clearly labeled, and occasional affiliate links to recommended products. I only feature products that I truly like, and my opinions are always my own.